 Google Authorship allows you to link your Google+ profile to the content you create. It’s a powerful online personal branding tool that allows you to explicitly tell the search engines that a web page is your content.
This helps your branding in two ways. First, you get “credit” from Google for all of the content you create. This means better search results, especially if you have a large social graph. The second benefit is that your mug shot may actually appear in search results:
Here’s how to make sure your WordPress sites are properly set up for Google Authorship.
Step One: Create a Google+ Profile
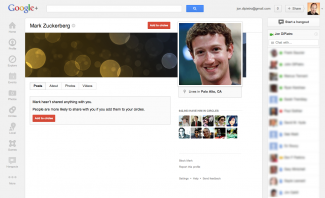
Even Mark Zuckerberg has a profile on Google+.
Whether we like it or not, Google is finding more and more ways to force strongly encourage us to use its Google+ platform. If you want to take advantage of Google Authorship, you’ll need to create a profile on Google+. You don’t necessarily need to be active there, but you do need to have a completed profile.
After you create your account, be sure to fill out your profile. Be sure you’re consistent with your avatar, tagline, biography, etc… If you need help, check out our social media cheat sheet for some important tips on how to do that.
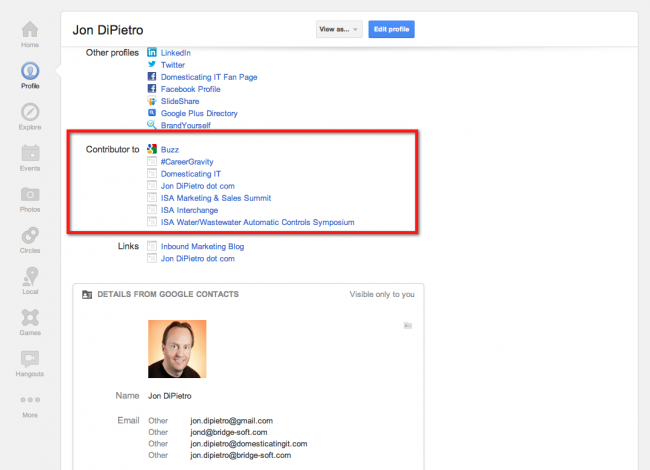
Step Two: Fill Out the “Contributor to” Section
Google needs some way to verify that posts on a particular domain are yours. One of the ways you can help Google is to tell them which websites you contribute to. Your Google+ profile contains a section that allows you to do this, appropriately called “Contributor to.” You’ll want to list any and all websites/blogs on which you post in this section:
Step Three: Configure Your WordPress User Profile
The whole reason I was inspired to write this blog post today was some troubleshooting on my own Google Authorship profile. I was doing some testing and realized that my #CareerGravity posts weren’t properly linked to my Google+ profile. It turns out that the root cause was my WordPress user profile.
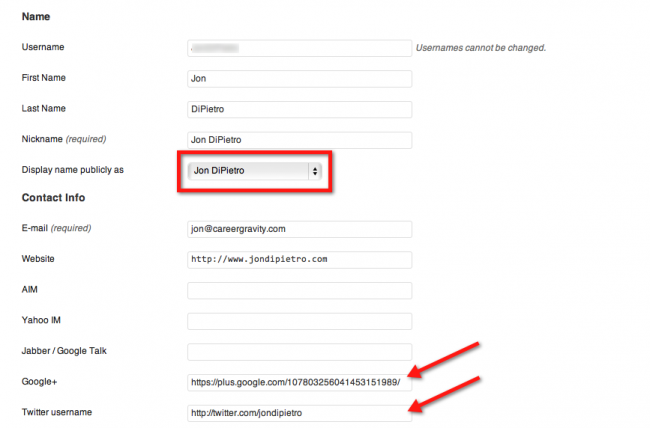
Google searches for a link on a page with a byline following the format of “By Jon DiPietro”. I discovered that because of the configuration of my WordPress user profile, my byline was “By JonDiPietro” and Google didn’t like that. Also, your user profile may have options to include your Google+ profile and Twitter page. Google uses both of these too. Your user profile should look something like this:
Step Four: Test Your Page
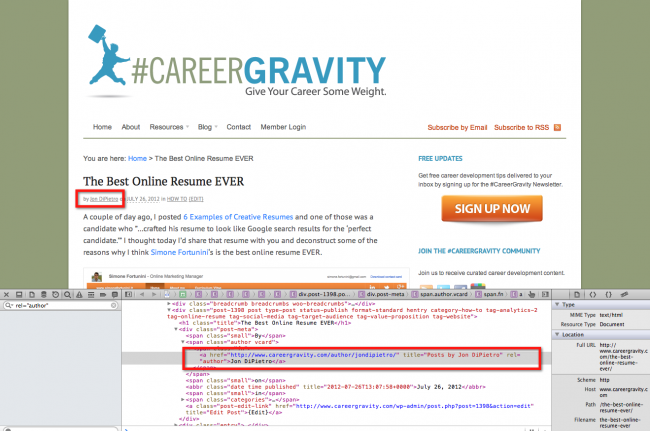
There are a couple of ways to confirm that everything is set up properly the first step is to look at one of your blog posts and check the byline. Make sure that:
- It contains a properly formatted byline (e.g. “by Jon DiPietro”)
- The link to your author page includes the rel=”author” tag
You can check this using the Inspect Element feature of your browser:
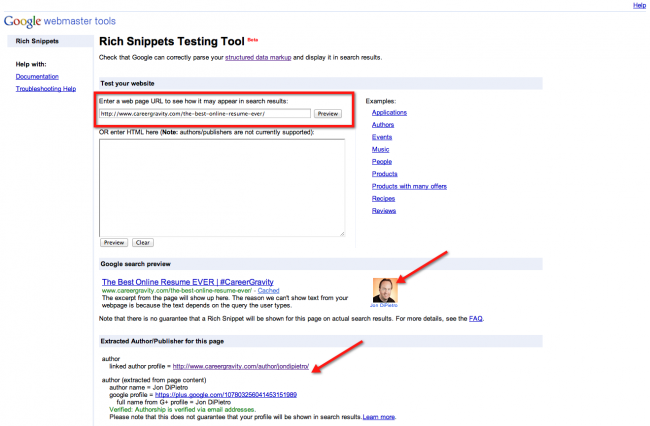
Another way to verify that all of the plumbing is connected properly is to use Google’s Rich Snippets Testing Tool. This tool allows you to enter a URL and see whether or not Google recognizes your authorship properly. If there are any issues, it also gives you some convenient options for rectifying problems. For example, it allows you to “claim” content as long as you have an email address from the same domain as the post.
Step Five: Monitor With Google Webmaster
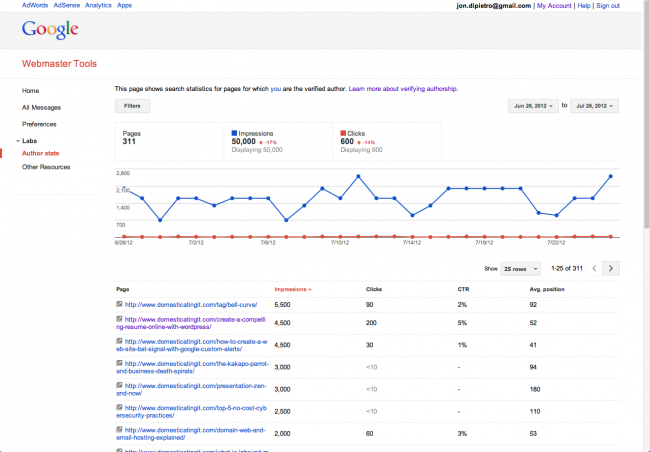
Once your Google Authorship profiles are correctly configured, you can monitor yourself using Google Webmaster’s Author stats feature. This will show you all of the pages Google has indexed under your name and how many search impressions and clicks they’ve received. As you can see, even with some broken profiles, my content has seen more than 50,000 search impressions in the last 30 days. Now that I’ve fixed up some broken links this should go up considerably.


No comments yet.